dax86: xv6-runnable x86 Emulator for Study Purpose
Contents
I wrote an x86 simulator that runs a small OS, xv6 for study purpose without translating binaries or memory. Everything is implemented C codes.
Repository Link: https://github.com/ykskb/dax86
Here’s some key points about it (excerpt from README):
Why:
- I wanted to learn how an OS runs on CPUs at architecture / instruction level.
What:
- Runs vanilla xv6 (memfs) image from boot.
- Each instruction is manually implemented and executed sequentially without binary translation, pipeline or OoOE.
- Representation of logic is prioritized over the performance. Codes have bunch of comments covering the instructions and the hardware mechanism as well.
In this article, I’d like to share some of the processes I went through to learn about the CPU architecture and develop this emulator as well as the difficulties I was faced with.
I’m writing about some of my key learnings in separate articles:
- xv6 image: Boot Sector
- xv6: Memory Addressing Part 1
- xv6: Memory Addressing Part 2 (coming soon)
- xv6: Device Emulation (coming soon)
Start
Firstly I started this project with this Japanese book. Whether you find the anime girl on cover cute or distracting, it’s a great book to get anyone started with CPU emulator development. It covers some of the core x86 instructions like mov, add, push and call as well as the basics of ModRM. Some of the structure for instruction definition and execution in dax86 comes from this book.
So I got a CPU emulator somewhat shaped and it could run some testing binaries. However it was nowhere near to run an OS at this point. The emulator didn’t have any device, segment registers or control registers and it only supported 32-bit binary which is only applicable after switching to the protected mode in the real world of x86. There were so many instructions to be implemented as well.
Booting
Having set up the goal of running xv6, I started to implement all the single-byte instructions while doing research on x86 architecture and xv6 internals concurrently. On the x86 architecture, I found about things like A20 line, segmentation, global descriptor table and paging. On the xv6 side, reading the boot block indicated I would need those different modes of memory addressing working as well as some devices like keyboard and disk.
At this point, as I was mostly working on the booting part, I could still write small chunk of assembly or c codes to exercise somewhat TDD approach. I set the expected behaviors with the test cases and tried to pass them. (You can see them in tests directory.) One thing about this is that those expected behaviors were entirely from my understanding of each component. I kept feeling uncertain there and often ended up being wrong. For example, I had misunderstood the base address calculation on GDT (which bits go where), so my tests were passing, however later on it came back as a hard bug when I was working on TSS (task state segment).
In the booting part, I found these 2 parts as the key learnings: kernel code loading from disk to memory and the page directory switching in page size extension. (Specifically the identical mapping to the first virtual mapping.) I’ve covered these in details in separate articles, but I must say figuring out the linker configuration and image creation on xv6 wasn’t that easy for me.
OS Initialization
Once I made booting work, I reached the main function of xv6. This is where xv6 configures more devices and chips as well as the memory page initialization, eventually starting the OS' scheduler loop in the user mode. First challenge for me here was MP (multi-processor) configuration. It involves MP configuration table, IOAPIC and LAPIC for multi-processor systems, where hardware interrupts need to be routed as configured among multiple processors. There are documentations available online, but it’s often challenging when you actually try to emulate them because in many cases those docs only touch the concept and never give you the whole data flow in details. Generally I ended up landing on the CS course materials in university websites. It was obvious this kind of challenges were not developers' daily problems and I almost never found the solution on Stackoverflow. After learning about them, I ended up using threads with locks for device emulation to send and receive IO data asynchronously and separately from the main thread.
The second half of the main function got me stuck for some time. It was the TSS (task state segment) as mentioned above and also ISR (interrupt service routine), both of which are about switching the context of instruction execution. At this point, having a number of init processes run before hitting the issue, I couldn’t create the test case really to exercise TDD approach. Instead I did quite dirty debugging by targeting specific instruction pointer (EIP) and printing out some key info on the emulator. Literally I printed out some memory region of certain range and debugged the issues. It sometimes felt like locating some broken bridge out of world map. Only thing I could do was scoping the search area gradually with some instinct and creativity as a clueless investigator.
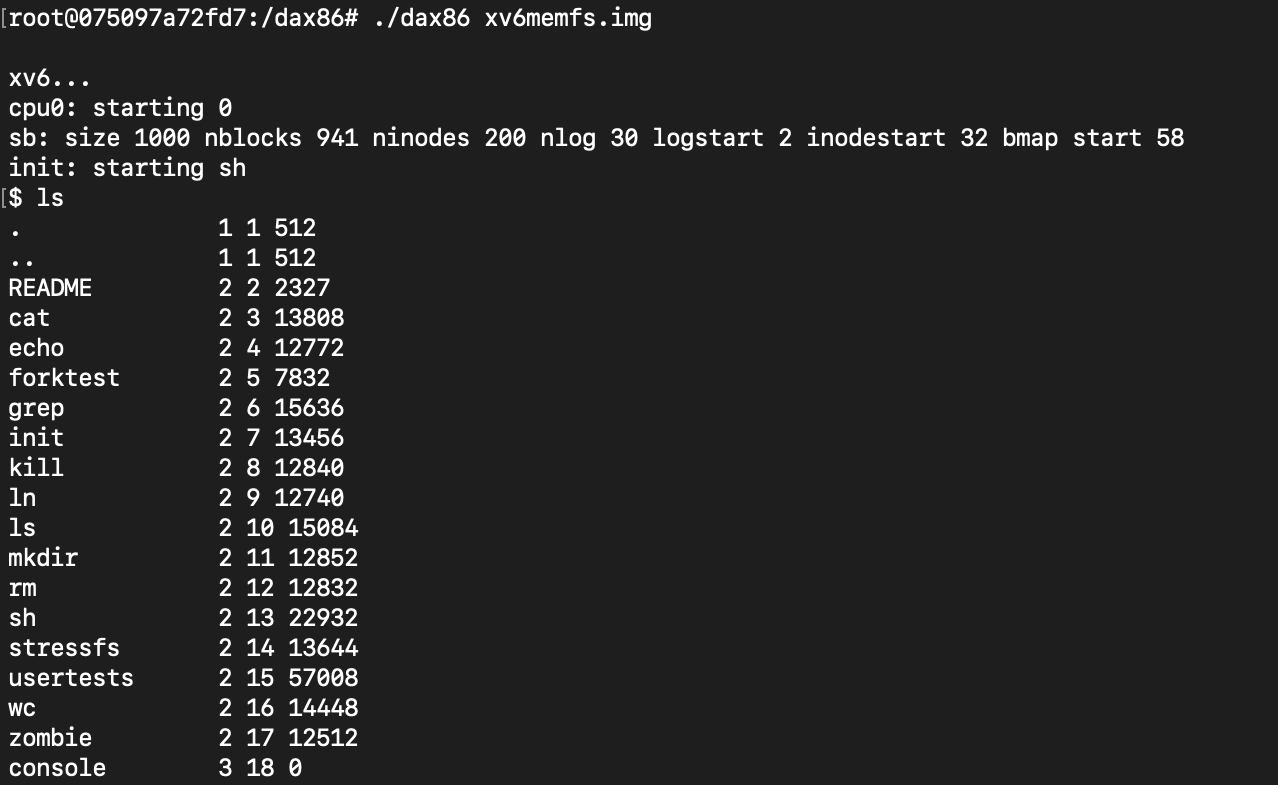
First Shell Command
Last one of the challenges was actually a bit funny. It was keyboard mapping after I confirmed the shell running in the user mode. Of course xv6 is a real OS to run on hardware, so it handles the scan code instead of ASCII characters. Not wanting to fiddle with the TTY setting of a running environment too much, I made a map from ASCII back to scan code. Once I finished it, I confirmed I could run ls. It was quite slow but I think I can say it was the best ls command I’ve ever run.
P. S.
At the point of writing this article, commands like ls, mkdir and echo run fine. However it doesn’t seem to be so stable yet. There seem to be some spots possibly wrong with the user modes' page mapping or context switching, resulting in “remap” error from the OS. Segmentation error was occasionally observed at certain EIP address in the user mode as well. These indicate there is still a bit more for me to investigate on the implementation and there are multiple parts in xv6 that I haven’t fully understood yet. Hopefully I can achieve them and share more key findings in this blog. Thanks for reading :)